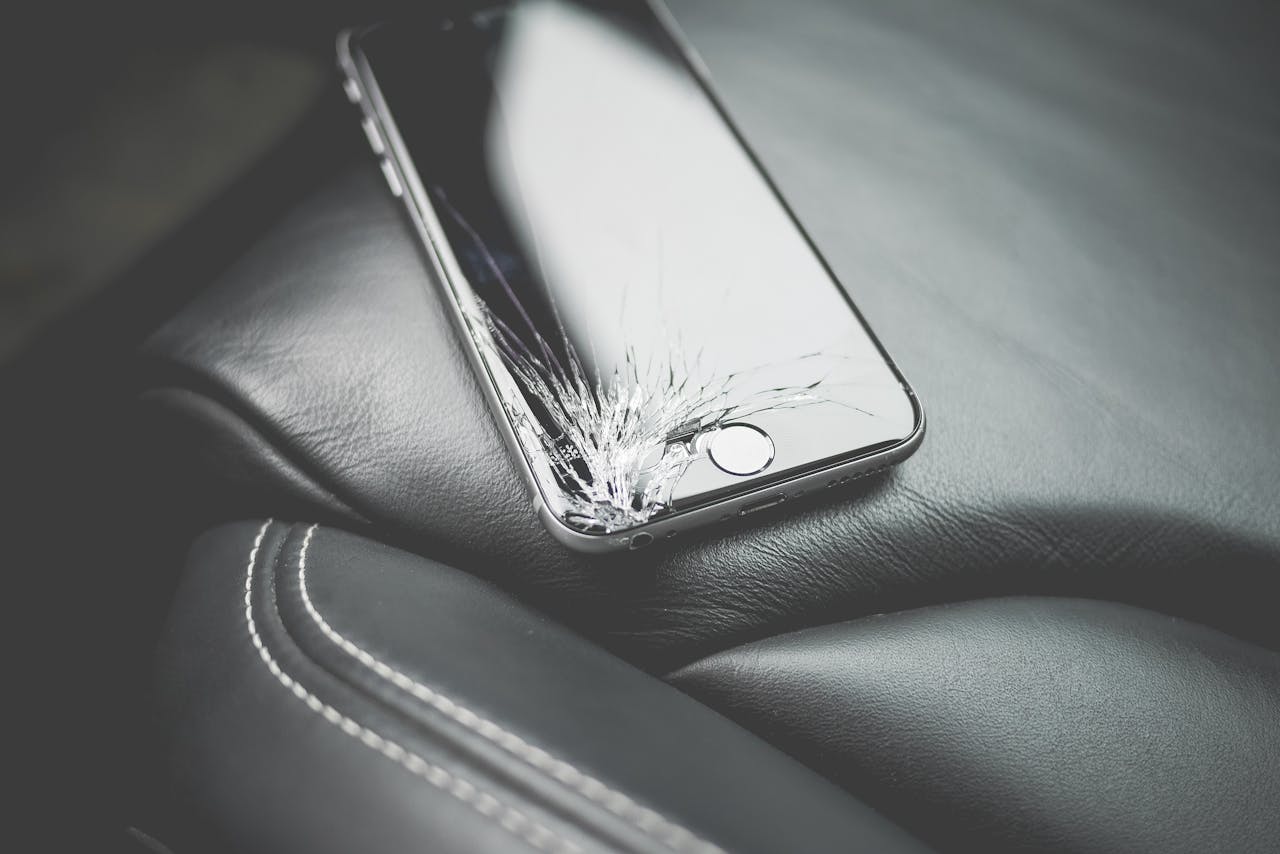
You’ve made the smart financial choice: you decided to fix your phone instead of replacing it. But within weeks or months, you notice a problem—a dark spot appears, the touch sensitivity is off, or worse, the screen cracks again far too easily. It feels like you’ve been burned, and now that initial repair cost feels like money wasted.
This happens all the time, and it’s deeply frustrating. The failure isn’t because the phone is “too broken” or “too old.” It’s almost always down to one of two things: the component quality or the technician’s technique.
Section 1: The Component Crisis – Not All Screens Are Created Equal
If a repair shop quotes you a price that seems too good to be true, the answer is virtually always sitting right beneath the glass: the quality of the replacement part. Understanding component grades is the single most important piece of knowledge you can have as a consumer.
1.1. Deconstructing Screen Anatomy
A modern iPhone screen isn’t just one piece of glass; it’s a sophisticated assembly of several critical layers that work together:
- The Cover Glass: The outermost layer you touch. Its durability, scratch resistance, and oleophobic (oil-repellent) coating are key to user experience.
- The Digitizer: The layer underneath the glass that registers your touch input. If this is poor quality, you get “ghost touches” or dead spots.
- The Display (LCD or OLED): The component that produces the image. This is where color accuracy, brightness, and resolution come from.
- The Flex Cables: Tiny, delicate cables that connect the assembly to the logic board. Poor quality cables are the number one cause of intermittent display failure.
1.2. The Three Grades of Replacement Screens
Reputable repair shops categorize their parts clearly. Here is the breakdown you need to know:
| Grade Name | Description & Origin | Pros & Cons | LTV Impact |
| A-Stock / OEM-Equivalent (Premium) | Parts manufactured to the same rigorous standards as the original screen, often using the same materials (e.g., specific display drivers). This is the gold standard. | Pros: Perfect fit, color accuracy, and longevity. Cons: Highest cost. | Highest. Maximizes the useful life of the phone. |
| Aftermarket / Mid-Grade | Mass-produced in third-party factories using cheaper materials. May use LCD technology where the original used OLED (for certain models). | Pros: Mid-range price. Cons: Noticeably duller colors, reduced brightness, and less responsive touch over time. | Medium. May cause frustration, leading to premature replacement. |
| B-Stock / Refurbished-Used | Assemblies that have been repaired by a third party (e.g., replacing only the cover glass on a broken original display). | Pros: Cheapest upfront cost. Cons: Inconsistent quality control, high risk of dust/dirt inclusion, and short life span. The component may be nearing the end of its life already. | Lowest. Risk of failure is extremely high, turning the repair into a wasted expense. |
The Hidden Cost of Low Quality: When you choose the cheapest option, you are not saving $50; you are accepting a component that will likely fail 6 to 12 months sooner than a premium screen. This forces you to either pay for a second repair or prematurely replace the entire phone, destroying your Lifetime Value calculation. We highly recommend asking your iPhone repair New York professional exactly what component grade they use for a screen replacement.
1.3. The OLED vs. LCD Trap
For some older flagship models, the original screen used high-contrast OLED technology, which offers deep blacks and vibrant colors. However, many cheap replacement screens substitute a less expensive LCD panel.
- User Experience Loss: An LCD replacement simply cannot match the color depth or true black levels of an OLED. This is a massive, immediate degradation of your phone’s intended viewing experience. The repair may not fail physically, but it fails in terms of satisfaction, which is a huge factor in whether you keep the phone or decide to upgrade.
- Power Consumption: LCD panels generally require a backlight, consuming more battery power than OLED screens. This means that cheap screen repair might subtly reduce your battery life, requiring more frequent charging and increasing your power cycle count—a cost that adds up over the lifetime of the phone.
Section 2: The Calibration Catastrophe – Technical Errors That Kill the Display
Even if a repair shop uses a premium, A-stock screen, the repair can still fail disastrously due to poor technique or a failure to execute necessary calibration steps. This is where the difference between a garage hobbyist and a certified professional becomes evident.
2.1. True Tone and Ambient Light Sensor Failure
Newer iPhones (iPhone 8 and later) rely on tiny sensors to adjust the color and intensity of the screen based on the ambient light—this is the True Tone feature.
- The Problem: The data for these functions is not stored on the new screen; it is stored on the original screen’s flex cable. A technician must carefully transfer this microscopic data, often requiring specialized, proprietary programming tools. This is a non-negotiable step that costs time and requires specific equipment.
- The Failure: If the original data isn’t correctly transferred, the True Tone feature simply vanishes. While the screen still works, the inability to adjust light correctly strains your eyes, resulting in a significantly poorer user experience that often leads people to believe the phone is the problem. This subtle loss of functionality feels like an incomplete repair.
2.2. The Face ID and Logic Board Connection
The most complex failure related to screen repair often involves the proximity sensor and flood illuminator, which are crucial for Face ID functionality.
- The Interdependency: This sensor assembly is linked directly to the phone’s logic board. It is one of the single most sensitive components on the entire device. Even a microscopic tear in the flex cable connecting this sensor means the Face ID system will fail its self-diagnostic.
- The Failure: Any tear, scratch, or even dust contamination on the Face ID flex cable during the screen transfer process can permanently disable Face ID. If this happens, only Apple or a shop with highly specialized logic board microsoldering capabilities can fix it. For most consumers, losing Face ID is a deal-breaker and forces an immediate, costly replacement. A high-quality repair technician protects this component with near-surgical care.
2.3. Sealing, Dust, and Water Intrusion
Every time an iPhone is opened, the internal water/dust-resistant seal is broken. It’s supposed to be water resistant, not waterproof, but that resistance is contingent on an unbroken seal.
- The Technique: A professional repair includes the application of a new adhesive gasket around the perimeter of the phone frame. This requires meticulous cleaning of the frame and precise placement of the new adhesive strip, a step often skipped by inexperienced or rushed technicians.
- The Failure: Without a new seal, the phone immediately loses its water and dust resistance. This isn’t just about dropping it in a pool; it means simple humidity, a splash of rain, or pocket lint can slowly corrode the internal components, causing catastrophic failure months down the line. This is a crucial element of technique that determines long-term success.
Section 3: The Slow-Burn Failures – Why Your Phone Seems Fine… For Now
The most insidious repair failures aren’t immediate; they’re the slow-burn issues that creep up months after the service. These are almost always related to shortcuts taken by the technician that fundamentally compromise the internal hardware.
3.1. Logic Board Stress and Stripped Screws
When a screen is replaced, dozens of tiny screws must be removed and re-inserted. This is where precision and patience are non-negotiable.
- The Problem: The internal screws inside an iPhone are not interchangeable. They vary in length by fractions of a millimeter. When a technician is rushing or simply careless, they might accidentally insert a slightly longer screw into the hole meant for a shorter one (often near the battery or display connector).
- The Failure (The Long Screw Damage): This is known in the repair world as “long screw damage.” The longer screw drills through the delicate multi-layered logic board, damaging internal traces and components. The phone might work fine for a few weeks, but eventually, the damage will cause random reboots, Wi-Fi failure, or total blackout. This failure is a death sentence for the logic board and is entirely due to poor technique.
- The Fix: There is no simple fix. This requires expensive, specialized microsoldering on the logic board—a service only a tiny percentage of shops offer. This kind of failure instantly destroys the LTV of the repair.
3.2. Connector Damage and EMI Shields
The display and battery connectors on the logic board are protected by metal shields, which must be carefully removed and replaced.
- The Role of the Shield: These shields serve two purposes: they physically hold the connectors down (preventing disconnection if the phone is dropped) and they act as EMI (Electromagnetic Interference) shields, preventing your phone’s Wi-Fi, cell signal, and GPS from being interrupted by the logic board’s own electrical noise.
- The Failure: A rushed technician often bends or breaks these flimsy shields, or worse, forgets to replace them altogether. The result isn’t immediate failure, but slow, noticeable performance decay: dropped calls, slow Wi-Fi speeds, or a constantly searching GPS signal. This dramatically degrades the user experience, forcing an upgrade not because the screen failed, but because the phone is no longer reliable.
3.3. Battery Compromise
The screen replacement process puts the battery at risk if the technician isn’t careful.
- The Procedure: The battery sits right underneath the screen assembly. When removing the display, the technician must not scratch or puncture the lithium-ion battery cell. The proper way to remove an adhesive-bonded battery is to use the pull-tabs designed for that purpose, or a very specific solvent.
- The Danger: If a battery is punctured, it can vent toxic fumes, catch fire, or, most commonly, be subtly damaged, leading to accelerated degradation. If your phone’s battery health suddenly drops 5% after a screen repair, that’s a massive red flag indicating physical damage was likely inflicted during the repair. This reduces the phone’s lifespan and its LTV.
Section 4: Choosing the Authority – Vetting Your Repair Technician (EEAT Principles)
Since the quality of the component and the integrity of the technique are so crucial, how do you, as a consumer, choose a service provider you can trust? This is a question of Authority, Expertise, and Trustworthiness (EEAT).
4.1. The Warranty is Your Guarantee
A confident repair shop stands by its work. This is the simplest litmus test for quality.
- What to Demand: You should expect a warranty of at least 90 days on the replacement screen and the labor involved. Anything less than 90 days is a sign that the shop is using cheap, high-failure-rate parts and doesn’t expect the repair to last.
- What a Good Warranty Covers: It must cover failures related to the component itself (dead pixels, touch issues, screen flaking) and the labor (screen lifting, sealing failure). It should not cover subsequent physical damage (if you drop it again).
4.2. Transparency in Component Sourcing
Don’t be afraid to ask direct, pointed questions about where they source their parts. A professional will be proud to tell you.
- Ask for Grades, Not Just Prices: Ask, “What grade of display are you using—A-stock/OEM-equivalent, or aftermarket?” If they dodge the question or use vague terms like “high-quality generic,” walk away. If they can’t be transparent about the most expensive part they’re installing, they are hiding something.
- Ask About Calibration: Specifically ask, “Do you have the tools to transfer the True Tone data from my old screen?” A “Yes” shows they understand the technical demands of modern repairs.
4.3. The Local Presence and Reputation Check
The best indicator of a shop’s long-term trustworthiness is its local footprint. Does it have history? Does it have reviews?
- Checking Customer Feedback: Look for reviews that specifically mention longevity. Anyone can get a five-star review the day the phone is fixed. You want reviews that say, “My phone is still working great six months later.”
- Locating a Trusted Service: Choosing a phone repair New York professional with a strong reputation, backed by local reviews and a visible presence, provides the highest confidence in the quality of work performed. This kind of detailed intervention is why professional services differ so vastly from the “DIY kit” method—one is a hope and a prayer; the other is a calculated engineering process.
Section 5: User Error and Protection – Why Screens Break Again
Sometimes the repair fails not because of the technician, but because of habits the user continues. Understanding these factors is key to extending the LTV of your newly repaired phone.
5.1. The Case and Screen Protector Misconception
Many people use a thin, aesthetic case and assume they are protected. They are not.
- The Corner Impact: Most screen cracks start when a corner of the phone hits a hard surface. If the case doesn’t have a robust, shock-absorbing material that wraps around the edges and includes raised lips, it will fail to dissipate the impact energy, transmitting it directly to the glass.
- The Bezel Factor: A quality case must have a raised bezel around the screen and the camera. When the phone falls face-down, the raised bezel absorbs the contact, preventing the glass itself from hitting the ground. If your case is flush with the screen, it offers zero protection against a flat-surface drop.
- Tempered Glass Necessity: Always apply a high-quality tempered glass protector immediately after the repair. This sacrificial layer is engineered to absorb impact before it reaches the phone’s display. It will shatter instead of allowing the kinetic energy to transfer and spider-web the actual phone screen underneath. It’s the cheapest form of insurance you can buy.
5.2. Thermal Stress and Pocket Pressure
The life of a screen is also affected by environmental factors and careless handling.
- The Heat Cycle: Leaving your phone on the dashboard of a car on a hot day, or using it continuously while it’s charging and running a high-intensity app (like a game), creates intense internal heat. Heat softens the adhesive that holds the screen assembly together and to the frame, making the glass far more susceptible to lifting or cracking under minor stress.
- The Pressure Point: Carrying your phone in a back pocket and sitting on it, or keeping it in a tightly packed backpack, subjects the glass to unnatural twisting pressure. High-quality glass can withstand impact, but it struggles with twisting or bending forces. This can cause the display layers to separate (delamination) or stress cracks to start from the edges, appearing without any sudden impact.

Conclusion and Final Thoughts
Screen repair failures are not accidents; they are often the result of predictable shortcuts—inferior parts, neglected calibration, or poor physical technique.
The true definition of a successful repair is not just that the screen turns on, but that the repair maintains the phone’s Lifetime Value (LTV), allowing the device to perform optimally for another two or three years without issue.
When facing a broken screen, the smartest, most financially sound decision is always to choose a professional repair—but only after verifying their commitment to quality components, expert technique, and transparent warranties. You have every right to demand the best. Ask the tough questions, vet the components, and protect your investment for the long haul.
FAQs (Frequently Asked Questions)
Q1: How can I check if my screen has been properly calibrated after a repair?
A1: The easiest check is the True Tone feature. Go to Settings > Display & Brightness. If you see the “True Tone” toggle switch, it likely worked. If the toggle is missing, the calibration was not done correctly. You should also compare the brightness and color of your repaired phone to another similar model. If your screen looks noticeably dimmer or cooler/warmer, the component quality is suspect.
Q2: Are there different qualities of back glass repair?
A2: Yes. Back glass replacement is even more complex than the front screen, often requiring the use of a high-powered laser to safely remove the damaged glass without damaging the sensitive components underneath (like the wireless charging coil). A high-quality back glass repair will look flawless, retain the wireless charging functionality, and include a new adhesive seal. A low-quality repair often involves prying, risking damage to the battery or logic board, and may leave visible adhesive residue.
Q3: Can a repair shop fix “long screw damage”?
A3: Fixing long screw damage requires specialized microsoldering. This is an advanced service where a technician uses a microscope and tiny tools to repair the broken traces on the logic board. Most general repair shops do not offer this. If your phone is diagnosed with long screw damage, you will need to seek out a highly specialized microsoldering expert, or sadly, consider the phone totaled.
Disclaimer
The information provided in this post is for educational and informational purposes only and is based on general economic principles and technology trends. It should not be considered personalized financial or investment advice. Always consult with a licensed professional before making decisions regarding complex asset repair or financial planning.